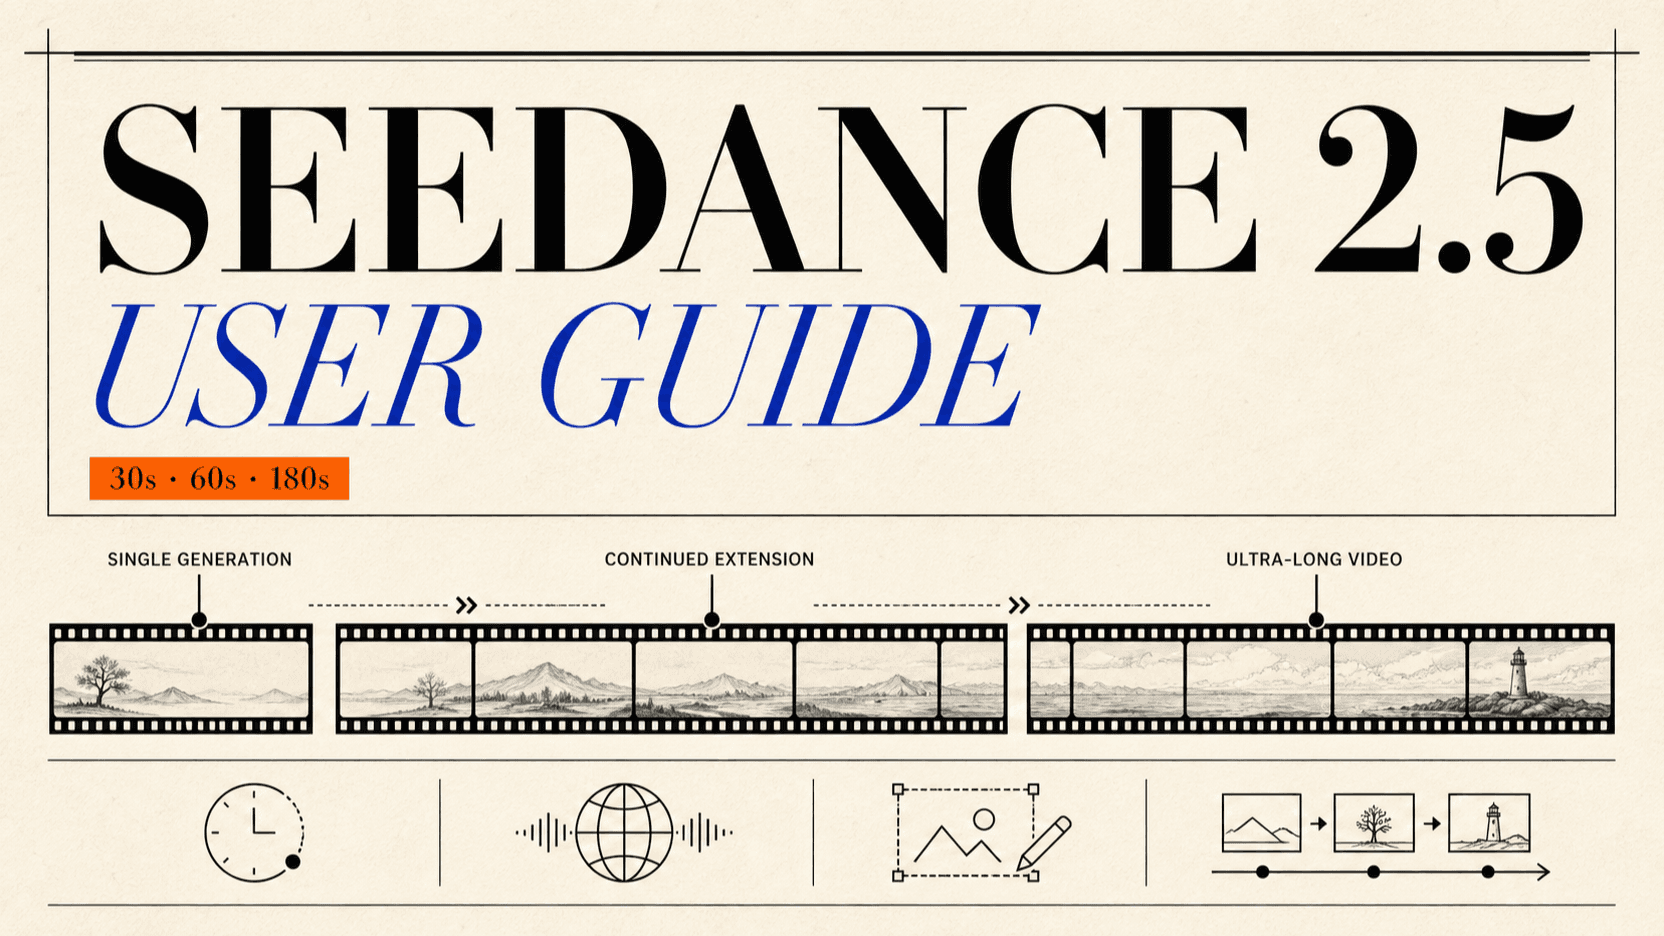
Dreamina Seedance 2.5 User Guide: 30s & Long-Video Modes
Dreamina Seedance 2.5 guide with examples for 30-second generation, extension, long videos, timestamps, references, editing, audio cleanup, and storyboards.
Dreamina Seedance 2.5 is best understood as a production workflow, not a single text box. You can build a complete scene of up to 30 seconds, extend eligible source videos into a longer sequence, plan an Ultra Long Video project of up to 180 seconds, direct events with timestamps, combine multimodal references, and repair selected parts without regenerating everything.[1]
The practical skill is choosing the smallest workflow that solves the shot. If this is your first AI video, you can begin with the eight-second copy-and-change example below. If you already run professional productions, the same guide expands into beat sheets, asset manifests, continuity locks, editing passes, and scene-level review. Every major workflow includes a reusable example and a concrete way to fix common failures.
TL;DR: choose the workflow before writing the prompt
- Use standard generation for one location, one main event, and roughly three to five consecutive beats inside 30 seconds.
- Use Extend Video when an existing clip already has the correct cast, framing, environment, and motion. Dreamina's guide says the source must be shorter than 30 seconds, and describes continued extensions up to a 60-second result; the extension prompt controls the newly added segment.[1]
- Use Ultra Long Video for a structured project of up to 180 seconds. Plan it as connected scenes with shared continuity rules, not as one enormous paragraph.
- Assign one job to every image, video, and audio reference. Also state what each reference must not control.
- Use time ranges for sustained action, exact moments for a visible beat, and relative timing when one event triggers another.
- Choose Smart Edit for an outcome-level change, Edit with Marks for a specific object or region, and Edit Video for a change tied to source footage or time.
- For every edit, write three lists: change, preserve, and validate.
- Treat subtitles, dialogue, sound effects, ambience, and BGM as separate layers. Name the layer to remove and the layers to protect.
Seedance 2.5 workflow at a glance
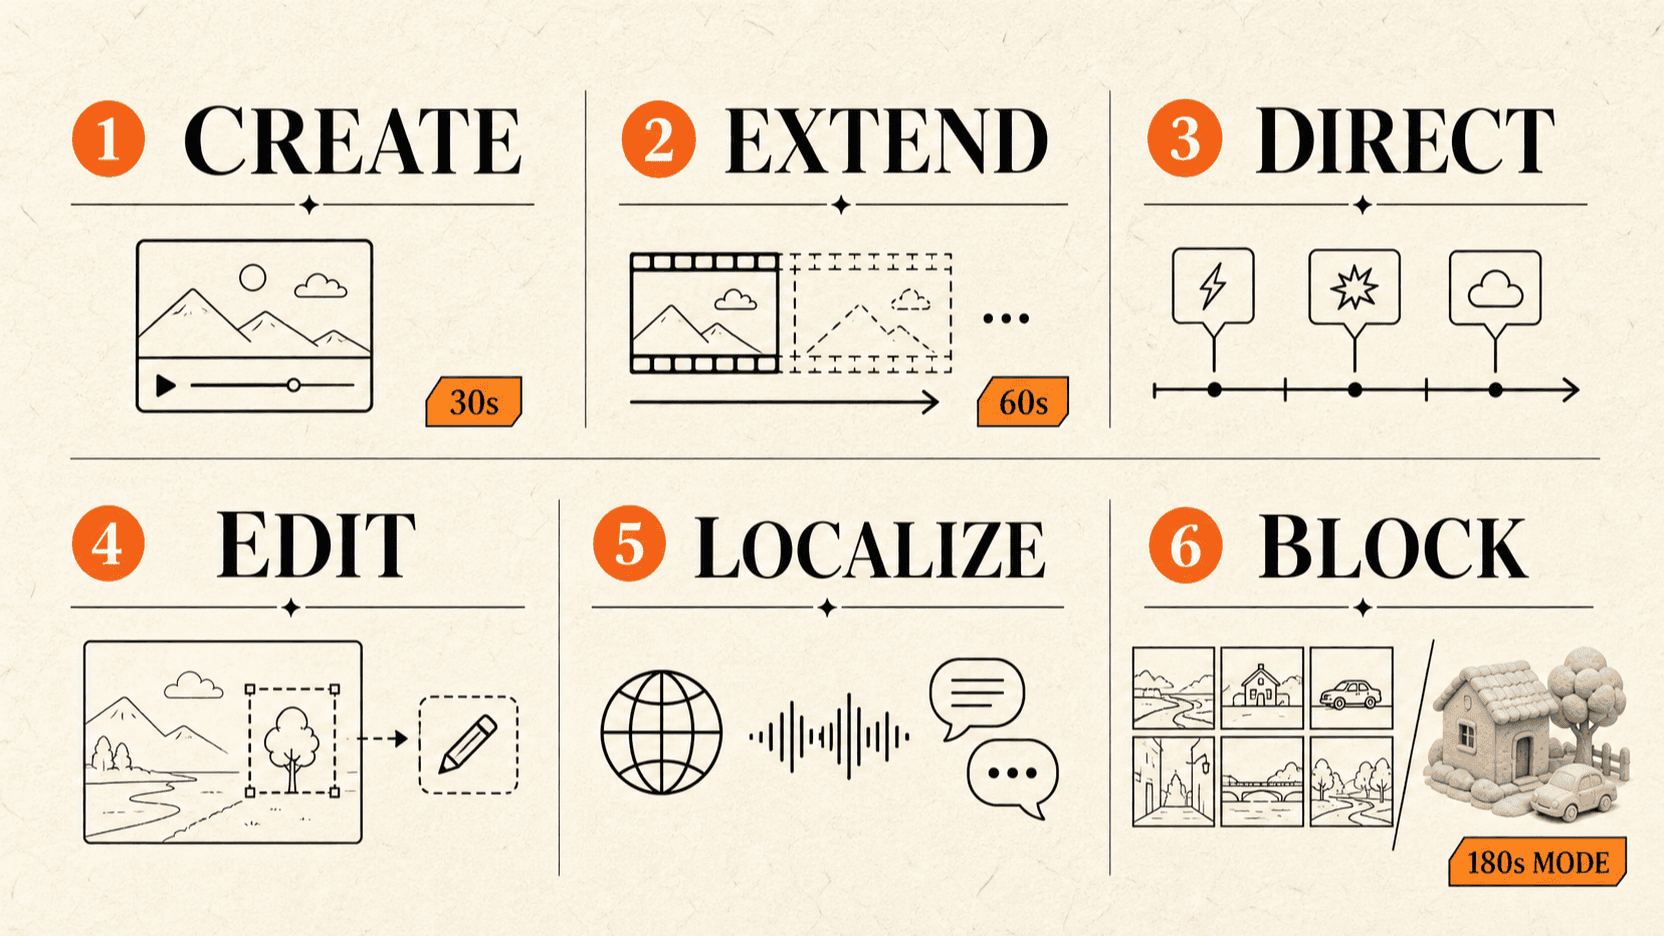
The six modules solve different production problems. Create establishes the shot. Extend protects continuity across a boundary. Direct assigns events to time. Edit changes the smallest possible target. Localize controls language and sound. Block supplies spatial structure through storyboards or Clay Renderer references.
How to use this guide as a beginner or a professional
You do not need a production vocabulary to start. Beginners can copy the smallest example, change the subject and scene, and generate a short result. Experienced creators can use the same example as a base layer, then add references, timed beats, continuity locks, editing passes, and formal review criteria.
| Your experience | Start here | Add only after the baseline works | Skip at first |
|---|---|---|---|
| First AI video | One subject, one action, one scene, 5–10 seconds | One camera instruction and one end state | Large reference packs and multi-scene stories |
| Some generation experience | 15–30-second beat sheet and 1–3 references | Audio, exact timing, first/last frames | Ultra-long projects before continuity is stable |
| Professional creator | Continuity sheet, asset manifest, scene cards, review rubric | Editing passes, Clay blocking, audio plan, transition design | Nothing by default—choose controls by production need |
Beginner example: make one clear eight-second shot
Copy this complete example, then replace the subject, action, and location with your own.
Input — complete prompt
Create an 8-second realistic video.

One golden retriever walks into a sunny kitchen, stops beside a blue food bowl,
and looks toward the camera.

Use a fixed eye-level medium shot. Keep the dog fully visible.
Natural morning room sound, no dialogue, no music.

End with the dog standing beside the bowl and looking at camera.
Why it works:
- One subject: the model does not need to track a cast.
- One action chain: enter, stop, look.
- One location: there is no scene transition to invent.
- One camera rule: a fixed medium shot reduces competing direction.
- One end state: you can immediately decide whether the result passed.
If the dog never reaches the bowl, shorten the entrance or remove “looks toward the camera.” Do not solve an overloaded action by adding decorative adjectives.
Advanced version: build on the same shot
Once the baseline works, add controls instead of replacing the whole prompt:
Input — complete prompt
Create a 12-second realistic video.

@Image 1 defines the same golden retriever's face, coat color, and red collar only.
@Image 2 defines the sunny kitchen layout and blue bowl only.
Do not copy the people, camera angle, or background objects from the references.

0–5 seconds: the dog enters from frame left and walks toward the blue bowl.
End state: all four paws stop beside the bowl.

5–9 seconds: the dog looks down at the bowl, then raises its head.
End state: the dog's head faces forward.

9–12 seconds: make one slow camera push-in as the dog looks at camera.
End state: the same dog and one blue bowl remain centered.

Preserve identity, red collar, bowl count, kitchen layout, morning light,
screen direction, floor contact, and natural room ambience.
The professional version adds identity ownership, reference exclusions, timing, camera movement, cardinality, and continuity. The story remains simple; only the control becomes more precise.
Find the example that matches your task
| Task | Example in this guide |
|---|---|
| First text-to-video generation | Eight-second dog-and-bowl example above |
| Image-referenced character or product | Advanced dog example and asset-manifest section |
| Full 30-second scene | Travel-bottle timed prompt |
| Continue a successful clip | 10-second source plus 5-second athlete extension |
| Change one object | Marked suitcase replacement |
| Remove subtitles or BGM | Cleanup examples with protected layers |
| Two-person dialogue | Mina and Owen identity-and-voice example |
| Replace a green background | Rainy station composite example |
| Guide complex motion | Clay Renderer handoff example |
| Build a long story | 180-second designer scene-card example |
Before generating: make a one-page production brief
A good production brief prevents more failures than a longer prompt. Write the information that must survive every generation, extension, or edit before uploading any references.
Build a continuity sheet
| Continuity item | What to record | Example lock |
|---|---|---|
| Character | Face, hair, clothing, age range, voice | Mina keeps the same short black hair and orange jacket |
| Prop | Shape, color, count, owner | One silver parcel, always carried by Mina |
| Space | Entrance, exits, relative positions | Counter remains left; pickup door remains frame right |
| Camera | Axis, height, direction, movement | Eye-level camera; no axis reversal |
| Light | Direction, color, time of day | Soft morning light from frame left |
| Audio | Dialogue language, voice, ambience, music | English dialogue, quiet store ambience, no BGM |
| Start state | What is visible before the action | Mina stands outside with the parcel in her right hand |
| End state | What must be visible after the action | Parcel is centered on the counter; both hands leave it |
Use observable locks. “Keep the scene cinematic” cannot be verified. “The orange jacket, one parcel, left-to-right movement, and morning light remain unchanged” can.
Create an asset manifest
Dreamina's official prompt guide documents up to 30 images, 10 videos, and 10 audio clips, with 50 materials in total. Video references and audio references each have a combined limit of 30 seconds.[2] The maximum is capacity, not a recommended starting point.
| Asset | Its only job | Inherit | Do not inherit |
|---|---|---|---|
@Image 1 | Character identity | Face, hair | Background, pose, clothing |
@Image 2 | Wardrobe | Orange jacket, black trousers | Model's face, studio lighting |
@Image 3 | Location | Counter layout, doorway, morning light | People, signs, products |
@Video 1 | Motion | Walking pace, parcel handoff | Performer, room, camera color |
@Audio 1 | Voice | Speaker tone and delivery | Words from the sample |
Start with the smallest set that fully defines the scene. Add another asset only when it resolves a specific failure.
Define pass conditions before generation
Reviewers need a shared definition of “done.” A compact pass list might be:
- The same character appears in every beat.
- Exactly one parcel remains in the scene.
- The action order matches the beat sheet.
- The camera stays on the same side of the action.
- Dialogue belongs to the correct speaker.
- The last frame reaches the stated end condition.
These checks turn subjective rerolling into a repeatable review process.
Start a project in Dreamina
- Open the official Dreamina creator site and enter AI Video.
- Select Seedance 2.5, then choose the input path that matches the job: text, multimodal references, first and last frames, an existing source video, extension, or an editing workflow.
- Set duration and aspect ratio before building references. Anchor images should use the same ratio as the intended output.
- Upload the smallest useful reference pack and label each asset's role in the prompt.
- Generate once, compare the result with the pass conditions, then choose between a prompt revision and a localized edit.
Do not respond to every failure by adding more text. If the identity is wrong, improve identity mapping. If the event order is wrong, simplify the beat sheet. If only one object is wrong, edit that object instead of regenerating the scene.
Choose between 30 seconds, extension, and Ultra Long Video
The duration options represent different production methods.
| Workflow | Described ceiling | Best for | Planning unit | Main risk |
|---|---|---|---|---|
| Standard generation | Up to 30 seconds | One complete scene | Timed beats | Too many events for one timeline |
| Continued extension | Source under 30 seconds; continued result up to 60 seconds | Continuing a successful clip | Boundary state plus new segment | Visible jump at the join |
| Ultra Long Video | Up to 180 seconds | Multi-scene stories | Scene cards and transitions | Character, prop, light, or audio drift |
Build one complete scene in 30 seconds
Thirty seconds works best when the viewer stays in one location and follows one main change. Begin with the final frame you need, then work backward into three or four stages.
Input — complete 30-second prompt
[Goal]
Create a 30-second product story for one reusable travel bottle.

[References]
@Image 1 defines the bottle shape, matte-blue finish, and white logo placement only.
@Image 2 defines the kitchen layout and morning window light only.
Keep exactly one bottle. Do not copy people from either image.

[0–7 seconds]
One runner enters the kitchen and places the closed bottle at the center of the counter.
End state: the bottle stands upright; both hands leave it.

[7–16 seconds]
The runner opens the bottle, adds water, and closes the lid.
End state: the lid is fully closed; no water is spilled.

[16–24 seconds]
The runner picks up the same bottle and walks toward the door.
End state: the runner reaches the doorway with the bottle in the right hand.

[24–30 seconds]
Slow push-in as the runner turns the bottle label toward camera.
End state: one bottle fills the center third; the label is readable; the runner stops moving.

[Audio]
Natural kitchen ambience, lid click at 14 seconds, no dialogue, no BGM.

[Preserve]
Bottle geometry, matte-blue color, logo position, runner identity, wardrobe,
screen direction, kitchen layout, morning light, and camera axis.
This prompt gives every interval one main state change. If the model skips an event, reduce the number of actions before increasing the duration.
Extend an existing video without a visible jump
Dreamina's guide describes a concrete Extend Video flow and continued results up to 60 seconds:[1]
- Choose the target clip in the generation stream and open its extension control.
- Use an original clip shorter than 30 seconds; the guide marks that as an eligibility condition.
- Set the added duration using the visible duration control, timeline gesture, or direct value available in the interface.
- Write only the action required for the newly added portion. The source footage remains the master for the original segment.
- Generate the combined result, then review the seconds immediately before and after the join.
Suppose the source is 10 seconds and the added segment is 5 seconds. The extension instruction should describe those new five seconds, not rewrite the first ten:
Input — complete extension prompt
Extend @Video 1 forward by 5 seconds.

[Boundary state]
Continue from the final source frame: the athlete has just landed, knees bent,
right hand touching the floor, camera low and facing the athlete, blue arena light.

[New action]
The athlete rises, looks directly toward the camera, and takes one controlled breath.
Do not repeat the jump or add another landing.

[Preserve]
Same athlete, uniform, body position at the join, camera height, lens direction,
arena geometry, blue light, motion speed, crowd ambience, and source aspect ratio.

[End state]
The athlete stands still at center frame and looks at camera; both feet remain planted.
Review the join at normal speed and frame by frame. Check pose, screen position, movement direction, prop count, lighting, focus, camera velocity, ambience, and audio level. A good continuation begins by matching the boundary; new story information comes second.
Plan an Ultra Long Video project of up to 180 seconds
Do not write a 180-second prompt as one uninterrupted paragraph. Divide the project into scene cards and give every card an entry state, one primary event, an exit state, and a transition.
| Scene card | Duration | Entry state | Primary event | Exit state | Transition |
|---|---|---|---|---|---|
| 1. Workshop | 0–25s | Designer enters empty workshop | Unpacks prototype | Prototype centered on table | Match cut on circular dial |
| 2. Street test | 25–60s | Dial fills frame | Product tested in rain | Product still working | Water droplet becomes window reflection |
| 3. Train | 60–105s | Reflection on train window | Designer reviews data | Green result appears | Screen glow becomes dawn light |
| 4. Lookout | 105–150s | Dawn light on face | Final field test | Designer smiles and packs product | Bag closes across frame |
| 5. End card | 150–180s | Dark frame after bag close | Product reveal and closing motion | Product centered, motion stopped | Hold final composition |
Prepare four reusable documents before generating:
- a character bible for face, hair, wardrobe, posture, and voice;
- a prop ledger for object appearance, count, owner, and condition;
- location rules for layout, time of day, weather, and camera direction;
- an audio plan for dialogue, ambience, effects, music, and transitions.
Test the hardest scene first. If a rain sequence, two-person exchange, or complex camera move cannot hold continuity in isolation, a longer timeline will magnify the problem.
Use multimodal references without making them fight
Multimodal input is useful only when ownership is explicit. A face image, clothing image, motion clip, room image, and voice sample can work together because each controls a different layer.
Set a priority order for conflicting references
When two assets contain overlapping information, state which one wins:
Reference priority:
1. @Image 1 controls face and hair.
2. @Image 2 controls clothing only.
3. @Video 1 controls motion timing and camera movement only.
4. @Image 3 controls room layout and light only.
5. @Audio 1 controls voice identity and delivery only.

If any reference conflicts, follow this priority order.
A weak instruction says, “Use all references for the character and style.” A controlled instruction names the owner of every attribute and excludes the irrelevant material in each file.
Keep first and last frames compatible
The first anchor establishes the opening composition and output ratio. The last anchor defines where the motion must arrive. Use matching aspect ratios, keep the subject count consistent, and explain what connects the two states. Additional identity references should not override the anchor compositions.[2]
Direct the timeline with three kinds of time instruction
Dreamina supports timestamp-based direction, but the timeline still needs a realistic action budget.[1]
| Timing method | Use it for | Example |
|---|---|---|
| Time range | Sustained action or a story beat | 6–12s: she opens the case and removes one camera |
| Exact moment | One visible or audible change | At 18s, the red practical light turns blue |
| Relative timing | Cause and effect | Two seconds after the door closes, the train begins moving |
Build a four-track beat sheet
| Time | Picture | Dialogue | Effects and ambience | Music |
|---|---|---|---|---|
| 0–6s | Mechanic opens workshop | None | Door roll, room tone | None |
| 6–14s | Mechanic places one camera on bench | “Let's test the stabilizer.” | Case latch | Low pulse begins |
| 14–22s | Camera powers on; status light changes | None | Power chime | Pulse continues quietly |
| 22–30s | Mechanic demonstrates one smooth pan | “No shake.” | Motor sound | Music ends at 29s |
Then turn the table into prompt language and add a visible end state to every range. Avoid assigning simultaneous dialogue, a prop change, a location change, and a complex camera move to the same two seconds.
Treat timestamps as direction, not a promise of frame-accurate nonlinear editing. If a key action lands too early, simplify the preceding beat or express the timing relative to a clear trigger.
Choose the right editing workflow
Dreamina lists Smart Edit, Edit with Marks, and Edit Video as distinct workflows.[1] They share a preserve-first discipline, but they solve different problems.
| Workflow | Best suited to | Prompt must identify | Main review risk |
|---|---|---|---|
| Smart Edit | An outcome-level correction | Desired result and protected content | The change spreads too widely |
| Edit with Marks | One object or bounded region | Marked target, replacement, edges, occlusion | Flicker or damaged boundaries |
| Edit Video | A source-footage change over time | Source master, time range, action, audio locks | Timing or motion drift |
Smart Edit: describe the result and the boundary
Use Smart Edit when the desired correction is easy to state but not tied to one tiny shape.
Input — Smart Edit instruction
Change the afternoon scene to light rain.
Add rain only outside the café windows and on the exterior pavement.
Preserve the two people, faces, hair, clothing, table objects, indoor lighting,
dialogue, camera movement, and all reflections already inside the café.
Validate that no rain appears indoors and no person's appearance changes.
Edit with Marks: control one object or region
Mark the smallest useful target. Describe the replacement, what should appear around its edges, and how it behaves under occlusion.
Input — marked-object instruction
The marked red suitcase is the only editable object.
Replace it with one navy hard-shell suitcase matching @Image 2.
Keep its original size, path, wheel contact, hand contact, shadows, occlusion,
and time in frame. Preserve every person and all unmarked luggage.
Edit Video: make the source the master
Input — source-video instruction
@Video 1 is the sole master for composition, people, action order, camera, and audio.
From 8–12 seconds, change only the desk lamp body from white to orange.
Update the lamp's local light spill on the desk.
Preserve faces, clothing, hand motion, desk geometry, camera movement,
dialogue, room ambience, and every event outside 8–12 seconds.
The official prompt guide notes that editing preserves the source ratio and approximately preserves duration, with a possible small difference of about 0.3 seconds from frame handling.[2] Review both edit boundaries instead of judging only the middle frame.
Remove subtitles, BGM, and unwanted visual elements
Cleanup tasks fail when “audio” or “text” is treated as one layer. Separate the categories before editing.
Remove irrelevant subtitles without deleting useful text
Input — subtitle cleanup instruction
Remove the subtitle line at the bottom from 4–9 seconds only.
Reconstruct the floor texture and moving shadow behind the removed letters.
Preserve the store sign, product label, wall poster, faces, camera movement,
dialogue, sound effects, and all text outside the subtitle region.
Check for letter fragments, soft rectangles, repeating background texture, and flicker as the camera moves.
Detach or remove BGM while protecting speech
Write an audio manifest before the edit:
Input — audio-layer instruction
| Layer | Action |
|---|---|
| Dialogue | Preserve both speakers and timing |
| Sound effects | Preserve door, footsteps, glass placement |
| Ambience | Preserve quiet restaurant room tone |
| BGM | Remove throughout the clip |
After cleanup, listen for clipped consonants, pumping volume, missing ambience, or a sudden noise-floor change. “Remove all background audio” is too broad when the scene needs effects and room tone.
Remove one object across time
For partial elimination, name the object, time range, newly revealed background, and occlusion behavior:
Input — object-removal instruction
Remove the black microphone stand from 0–14 seconds.
Reconstruct the wooden stage floor and blue curtain behind it.
When the singer crosses the area, preserve the singer in front and rebuild only
the hidden portion of the stand. Keep the microphone in the singer's hand.
Review the complete motion path. A clean still frame can still hide a ghost, popping edge, or broken shadow in motion.
Transfer an idea without copying unwanted details
“Transfer Ideas” is most useful when you isolate the layer worth borrowing: action logic, composition, camera rhythm, transition design, or story structure. Do not ask the source to control everything.
Input — transfer instruction
[Transfer]
Use @Video 1 only for the sequence: reveal object, circle it once, then end on a top view.

[Replace]
Use the ceramic tea set from @Image 1, the quiet studio from @Image 2,
and the warm paper texture described below.

[Do not inherit]
Do not copy the source performer, brand marks, text, colors, room, product,
music, or voice.
Review the result for accidental source identities, logos, wording, color palettes, and props.
Change spatial perspective without breaking geometry
A perspective edit needs spatial relationships, not an invented focal-length number. Describe the scene in layers:
- foreground: bicycle wheel crosses the lower-left edge;
- midground: courier and parcel remain centered;
- background: doorway stays behind the courier, two meters away;
- view direction: camera moves from front-left to side view without crossing behind the courier;
- preserve: body proportions, parcel shape, ground contact, horizon, and light direction.
After the edit, check scale, horizon, vanishing direction, occlusion order, contact shadows, and feet touching the floor. Objects that merely change viewpoint should not change size or ownership without a stated reason.
Control tone references and multi-person scenes
Multi-person generation becomes much more stable when every person has a profile and every line names its speaker.
Input — complete two-person prompt
<Mina> = face from @Image 1 + orange jacket from @Image 2 + voice from @Audio 1.
<Owen> = face from @Image 3 + grey shirt from @Image 4 + voice from @Audio 2.

0–6 seconds: Mina stands frame left; Owen stands frame right. Both remain still.
Mina says in calm English: {The test starts now.}

6–12 seconds: Owen presses one button with his right hand.
Owen says in a lower, measured voice: {Power is stable.}

12–18 seconds: Mina checks the display while Owen keeps both hands off the device.
No speaker, voice, clothing, position, or action swaps.
For a tone or voice reference, say whether the asset controls voice identity, pitch range, pace, emotion, or delivery. Keep the written dialogue separate so the sample does not accidentally supply the words.
Use green-screen editing for cleaner composites
The subject silhouette is the protected asset. Preserve face, hair strands, semi-transparent edges, clothing, pose, subject scale, motion blur, and movement timing while changing only the background.
Input — green-screen instruction
Replace the green background with a rainy station platform at dusk.
Keep the performer silhouette, hair edges, transparent raincoat, pose, scale,
walking motion, camera movement, and source duration unchanged.
Match the new background perspective and camera speed.
Add cool light from frame right, subtle wet-floor reflection, and a contact shadow
under both feet. Remove green spill without changing the raincoat color.
Inspect hair, fingers, motion-blurred edges, reflective clothing, feet, and any object crossing the silhouette. Edge shimmer is usually more visible during motion than on the preview frame.
Use Clay Renderer for motion and spatial blocking
Clay Renderer turns a simple white-model or blocked 3D scene into a spatial guide. The block should control geometry, camera path, movement, contact, and occlusion; separate references should control final identity, wardrobe, materials, environment, and visual style.[1]
Input — Clay Renderer handoff
@Video 1 is the Clay Renderer blocking reference.
Inherit only the two-person motion, camera path, table position, hand contact,
and occlusion order from @Video 1.

Replace Character A with <Mina> and Character B with <Owen>.
Use the workshop environment from @Image 5 and product materials from @Image 6.
Do not inherit white clay materials, placeholder faces, untextured background,
or temporary lighting from the blocking reference.

Preserve the blocked walking paths, handoff timing, subject scale,
camera direction, table contact, and final positions.
Compare the result against the block for path, contact, collision, scale, camera direction, and occlusion. Clay Renderer is a reference workflow; it should not be described as a native Maya or Blender scene-file integration unless an official integration is documented.
Build seamless transitions and multi-grid storyboards
A storyboard grid defines ordered visual states. It does not automatically explain the motion between them. Give each panel one job and write a transition sentence between every pair.
| Panel | Anchor state | Transition instruction |
|---|---|---|
| 1 | Chef holds closed box at waist | Camera follows as the box rises toward the table |
| 2 | Box centered on table | Chef opens lid while camera moves closer without changing axis |
| 3 | Product visible inside box | Product rotates once as chef's hands leave frame |
| 4 | Product fills center frame | Light softens and movement settles into final hold |
At each join, define the shared state: character position, facing direction, velocity, hand pose, prop ownership, camera direction, lighting, and ambient sound. Useful transition patterns include continuous action, matched composition, foreground occlusion, and a shared shape. Treat them as directing methods, not guaranteed interface presets.
Three end-to-end workflow examples
Example 1: a 30-second product story
Brief: Show one compact speaker unfolding, powering on, and playing music on a hotel desk.
Assets: front, side, and rear product images; one hotel-room reference; one unfolding motion clip; one power-on chime.
Sequence: map each image to one product view, write three timed beats, lock the speaker count to one, and state the final label orientation. Generate the baseline before adding camera movement.
Review: product geometry, hinge direction, button location, one-speaker count, desk contact, chime timing, and final label visibility.
Likely failure: three product views become three speakers. Correction: state that all product images describe the same unit and keep exactly one speaker in every frame.
Example 2: a 15-second result built from a 10-second source
Brief: Continue a successful athletic landing for five seconds.
Assets: one eligible 10-second source clip; no new identity reference unless the face already drifts.
Sequence: select Extend Video, add five seconds, restate the final pose and camera state, then describe the rise and final look. Do not rewrite the original ten seconds.
Review: one continuous athlete, no repeated landing, matching pose at the join, stable arena geometry, continuous camera motion, and unchanged ambience.
Likely failure: the extension begins with the athlete already standing. Correction: make the first extension frame continue the crouched landing pose before any new action.
Example 3: a multi-scene 180-second brand film
Brief: Follow one designer testing a prototype across workshop, street, train, and outdoor locations.
Assets: character profile, wardrobe views, prototype views, four location references, motion clips for the hardest actions, voice sample, and storyboard anchors.
Sequence: create scene cards, lock the prototype owner and condition, define audio transitions, generate the most difficult scene first, then connect scenes using shared shapes or motion.
Review: face, clothing, prototype geometry, prop condition, time-of-day progression, screen direction, voice identity, BGM continuity, and every scene boundary.
Likely failure: wardrobe or product details drift after the second location. Correction: repeat the character and prop profiles in every scene card and reduce scene-specific references that contain conflicting people or products.
Quality-control checklist before export
Identity and objects
- Each person keeps the assigned face, hair, clothing, voice, and position.
- Object count, owner, geometry, label, and condition remain consistent.
- No reference-only person, logo, subtitle, or prop leaks into the result.
Timing and story
- Every beat occurs in the intended order.
- Each time range reaches a visible end state.
- Dialogue, effects, and music support rather than compete with the action.
- The final frame satisfies the brief.
Camera and space
- Camera axis, height, direction, and movement remain intentional.
- Scale, horizon, contact, shadows, reflections, and occlusion make sense.
- Extensions and transitions have no visible pose, light, or audio jump.
Edits and cleanup
- Only the intended target changed.
- Edit boundaries do not flicker or drift.
- Removed text or objects reveal a plausible background.
- BGM cleanup preserves dialogue, effects, and ambience requested in the brief.
Troubleshooting common Seedance 2.5 problems
| Symptom | Likely cause | Practical fix |
|---|---|---|
| Timestamp ignored | Too many actions compete in one range | Reduce events and give the range one end state |
| Important action omitted | Timeline is overfilled | Split the action or move it into another stage |
| Character identity swaps | References are not mapped per person | Create named profiles and ban face, clothing, voice, and position swaps |
| References fight each other | Several assets control the same attribute | Add an explicit priority order and exclusions |
| Extension begins with a jump | Boundary pose or camera state is missing | Restate the final source frame before new action |
| Perspective edit distorts the subject | Spatial layers and protected geometry are vague | Define foreground, midground, background, scale, horizon, and contact |
| Removed object leaves a ghost | Hidden background and occlusion are unspecified | Describe what must be reconstructed through the full time range |
| Subtitle area flickers | Cleanup is judged on one frame | Review motion and require consistent texture reconstruction |
| BGM removal damages dialogue | Audio layers were grouped together | List dialogue, effects, ambience, and music separately |
| Green-screen edge shimmers | Fine edges and motion blur were not protected | Lock hair, fingers, transparent material, blur, and silhouette |
| Storyboard transition feels abrupt | Panels define states but not connecting action | Write a transition sentence between every pair |
| Long-video scenes drift | Global continuity rules are not repeated | Reuse character, prop, location, and audio profiles in every scene card |
Using the workflow in a product pipeline
Dreamina is useful for hands-on creation and editing. For software automation, Seedance 2.5 on reAPI is now callable as doubao-seedance-2.5-face, with 480p/720p/1080p output and documented request constraints.[3] Keep the model name configurable, save the prompts and pass conditions above as an evaluation set, and reuse the same continuity checks across API changes.
FAQ
How much action should fit into a 30-second prompt?
Use one main event with roughly three to five beats. Give every beat one observable end state. If an action is repeatedly omitted, reduce the event count instead of adding more adjectives.
How do I extend a scene without a visible jump?
Begin the extension by restating the source video's final pose, subject position, movement direction, camera state, light, and audio. Describe new action only after that boundary is locked.
Can any source video be extended?
The official Dreamina guide says the original source must be shorter than 30 seconds for the described Extend Video workflow.[1]
Should I use all 50 reference slots?
Usually not. Use the smallest pack that defines identity, wardrobe, props, scene, motion, and sound. Every additional asset creates another relationship that must be mapped and preserved.
What is the difference between Smart Edit and Edit with Marks?
Smart Edit is better for an outcome-level correction. Edit with Marks is better when you can point to one object or bounded region. In both cases, list what must remain unchanged.
How do I stop two speakers from swapping identity or voice?
Create a named profile for each person, bind face, clothing, and audio references separately, name the speaker in every dialogue line, and specify who remains still during the other person's action.
Can I remove BGM while keeping dialogue and effects?
Treat dialogue, sound effects, ambience, and music as four separate layers. Ask to remove BGM and explicitly preserve the other three, then listen for voice damage and level jumps.
What should Clay Renderer control?
Use it for blocking: geometry, camera path, movement, contact, and occlusion. Use separate references for identity, clothing, material, environment, and final style.
Why does a storyboard still need transition instructions?
Panels define anchor states, not all intermediate motion. A transition sentence explains how position, speed, camera, lighting, and props move from one anchor to the next.
Build the shot, then protect what already works
Seedance 2.5 becomes easier to direct when each workflow has a narrow job. Build short scenes from timed end states. Extend from a documented boundary. Organize longer projects with scene cards. Map every reference. Use localized edits only after defining what cannot change.
The most useful habit is also the simplest: before every generation or edit, write change, preserve, and validate. That turns a feature list into a repeatable production process.
References
- ByteDance Dreamina. Dreamina Seedance 2.5 User Guide. Modified July 31, 2026. Retrieved August 2, 2026 from bytedance.larkoffice.com
- ByteDance Dreamina. Dreamina Seedance 2.5 Prompt Guide. Modified July 31, 2026. Retrieved August 2, 2026 from bytedance.larkoffice.com
- reAPI. doubao-seedance-2.5-face — live model ID, supported resolutions, request constraints, and billing. Retrieved August 17, 2026 from reapi.ai/docs/seedance-2-5
Further reading
- reAPI. Dreamina Seedance 2.5 Prompt Guide. reapi.ai/blog/dreamina-seedance-2-5-prompt-guide
- reAPI. Seedance 2.5 camera control. reapi.ai/blog/seedance-2-5-camera-control
- reAPI. Seedance 2.5 for ecommerce video. reapi.ai/blog/seedance-2-5-ecommerce-video
- reAPI. Seedance 2.0 API documentation. reapi.ai/docs/seedance-2-0
More Posts
Author

Categories
More Posts
GLM-5.2 API Guide: 1M Context, Pricing, and Coding (2026)
Use the GLM-5.2 API with OpenAI-compatible code. Learn its 1M context, $1.40/$4.40 official pricing, reAPI rates, reasoning controls, and limits.
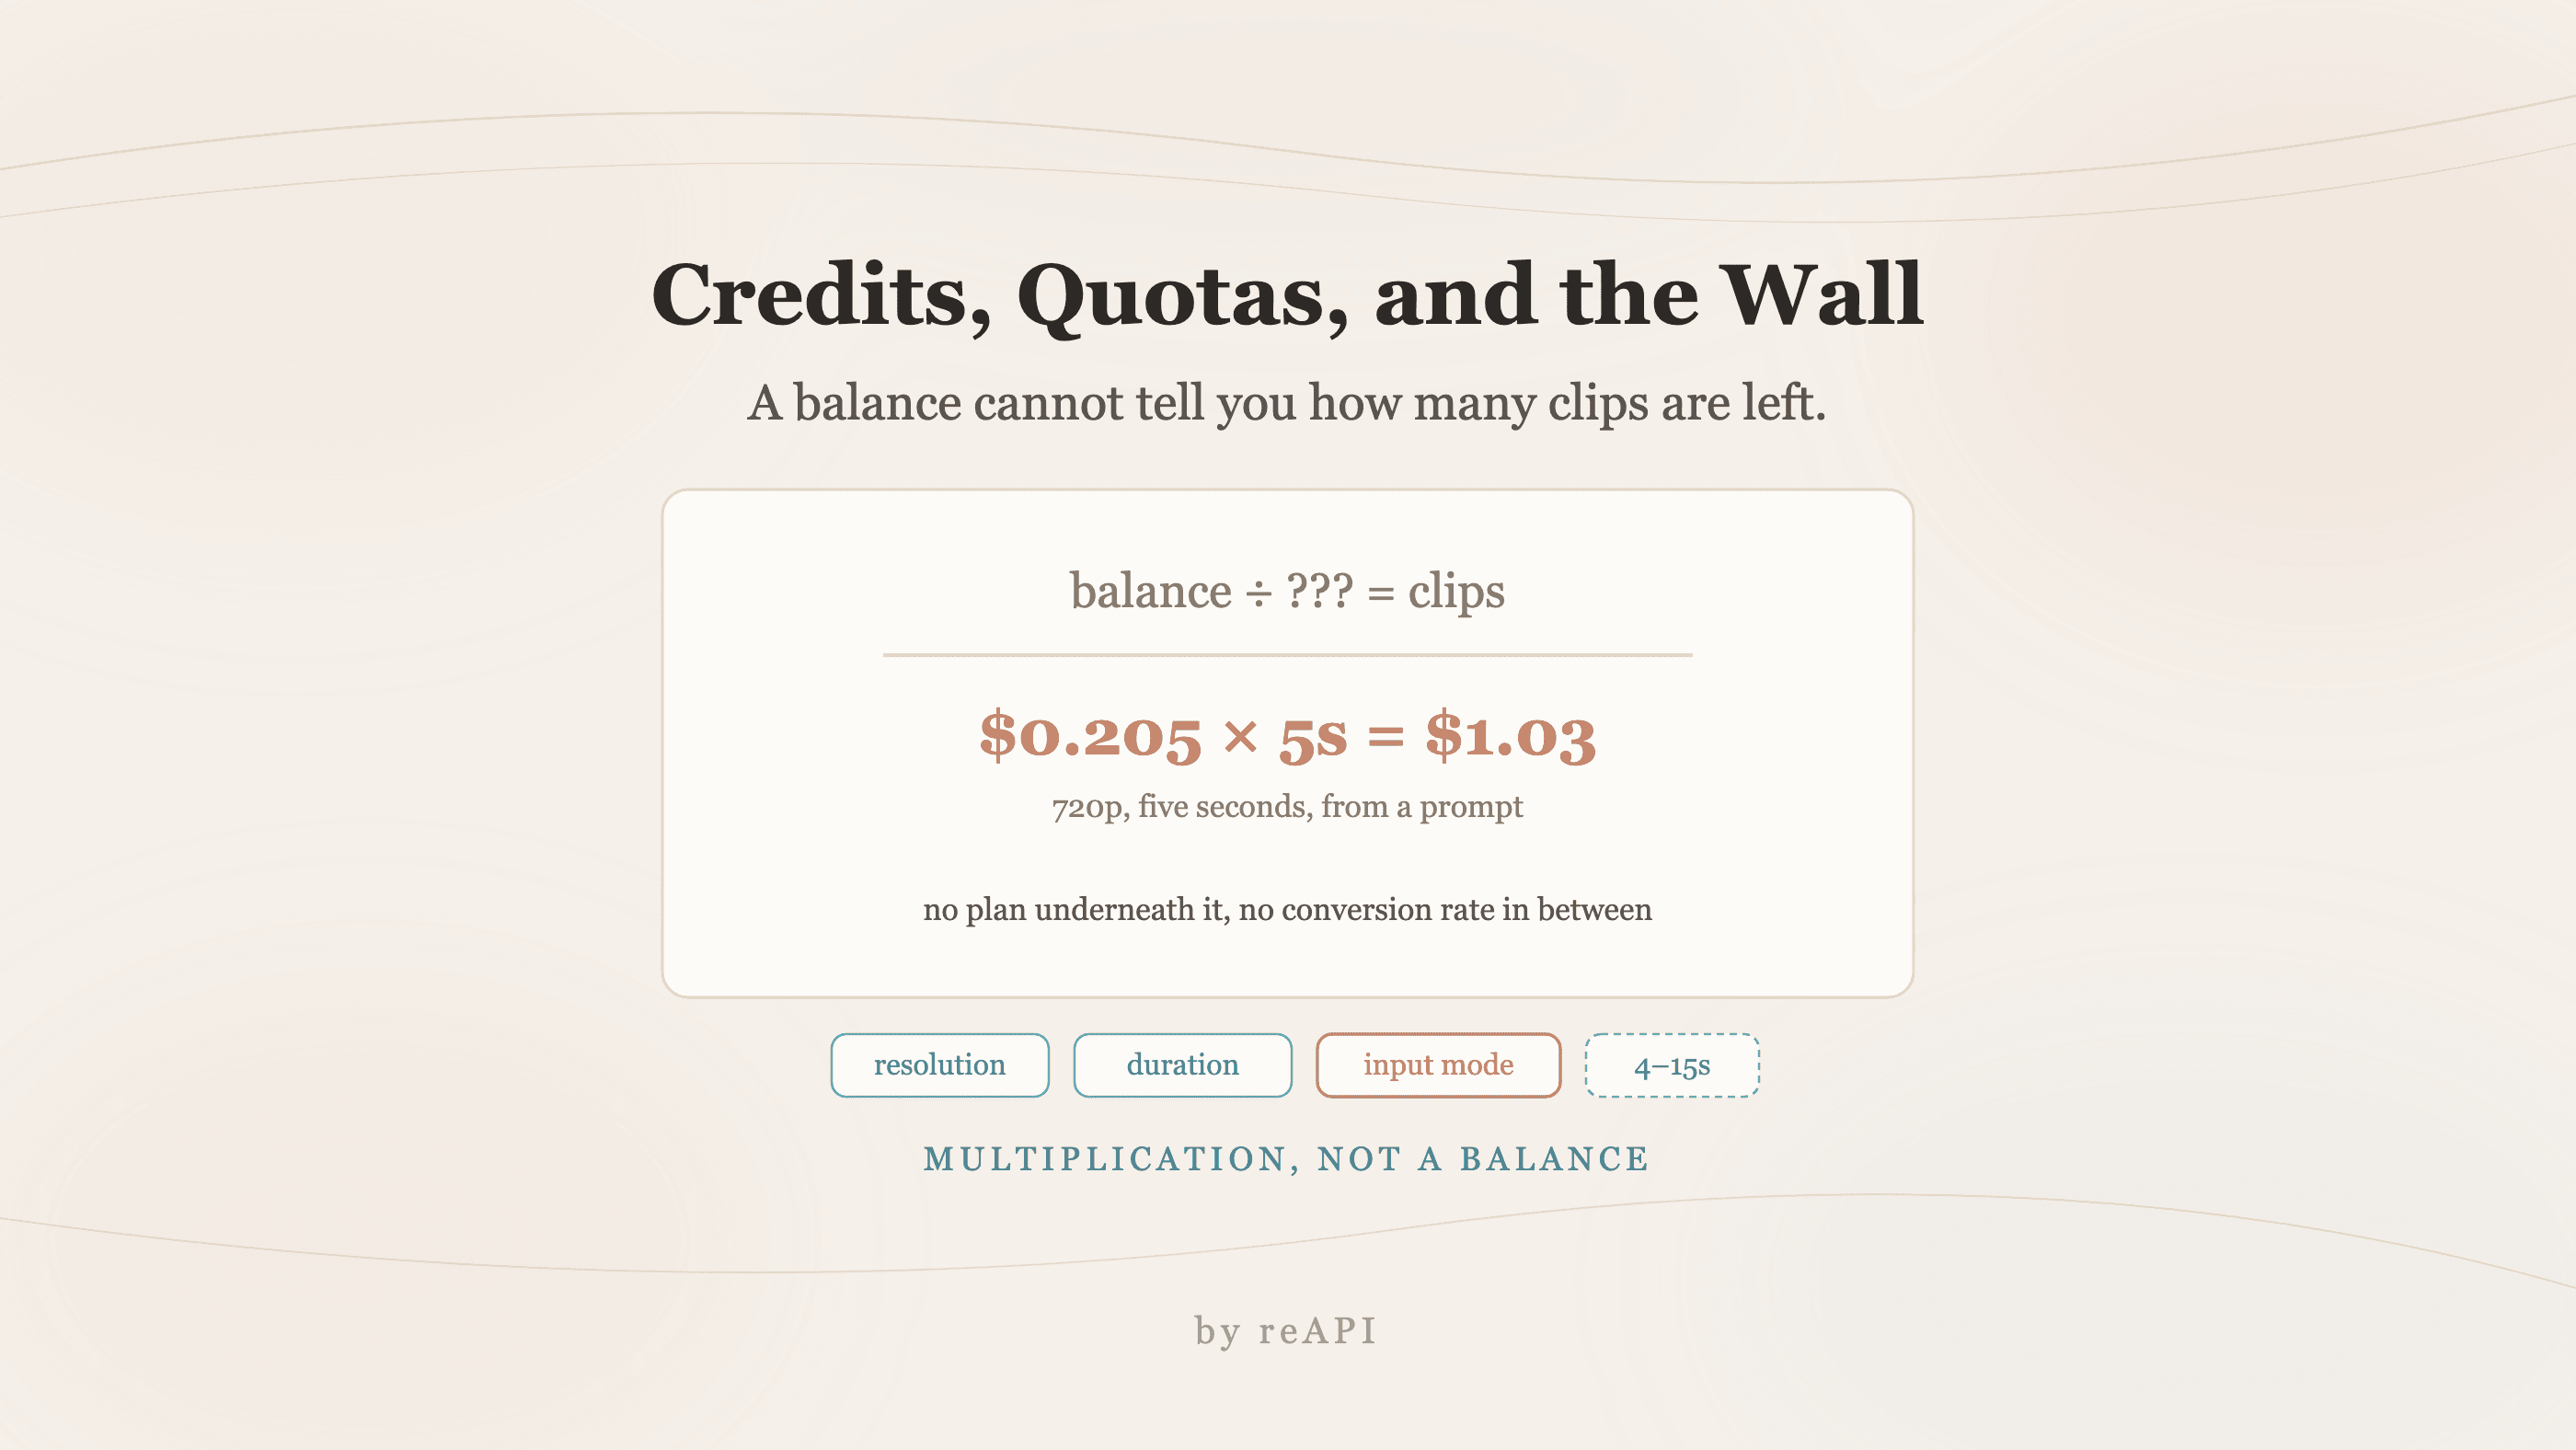
Seedance Credits and Quotas: Why the Balance Runs Out
How many clips a credit balance buys depends on resolution, duration and input mode at once. Per-second billing answers the same question with multiplication.
Best AI Video Generation API in 2026: Five Models Compared
Compare Seedance 2.5, MiniMax H3, Kling 3.0, Veo 3.1, and Vidu Q3 by duration, references, audio, resolution, billing unit, and real workload fit.