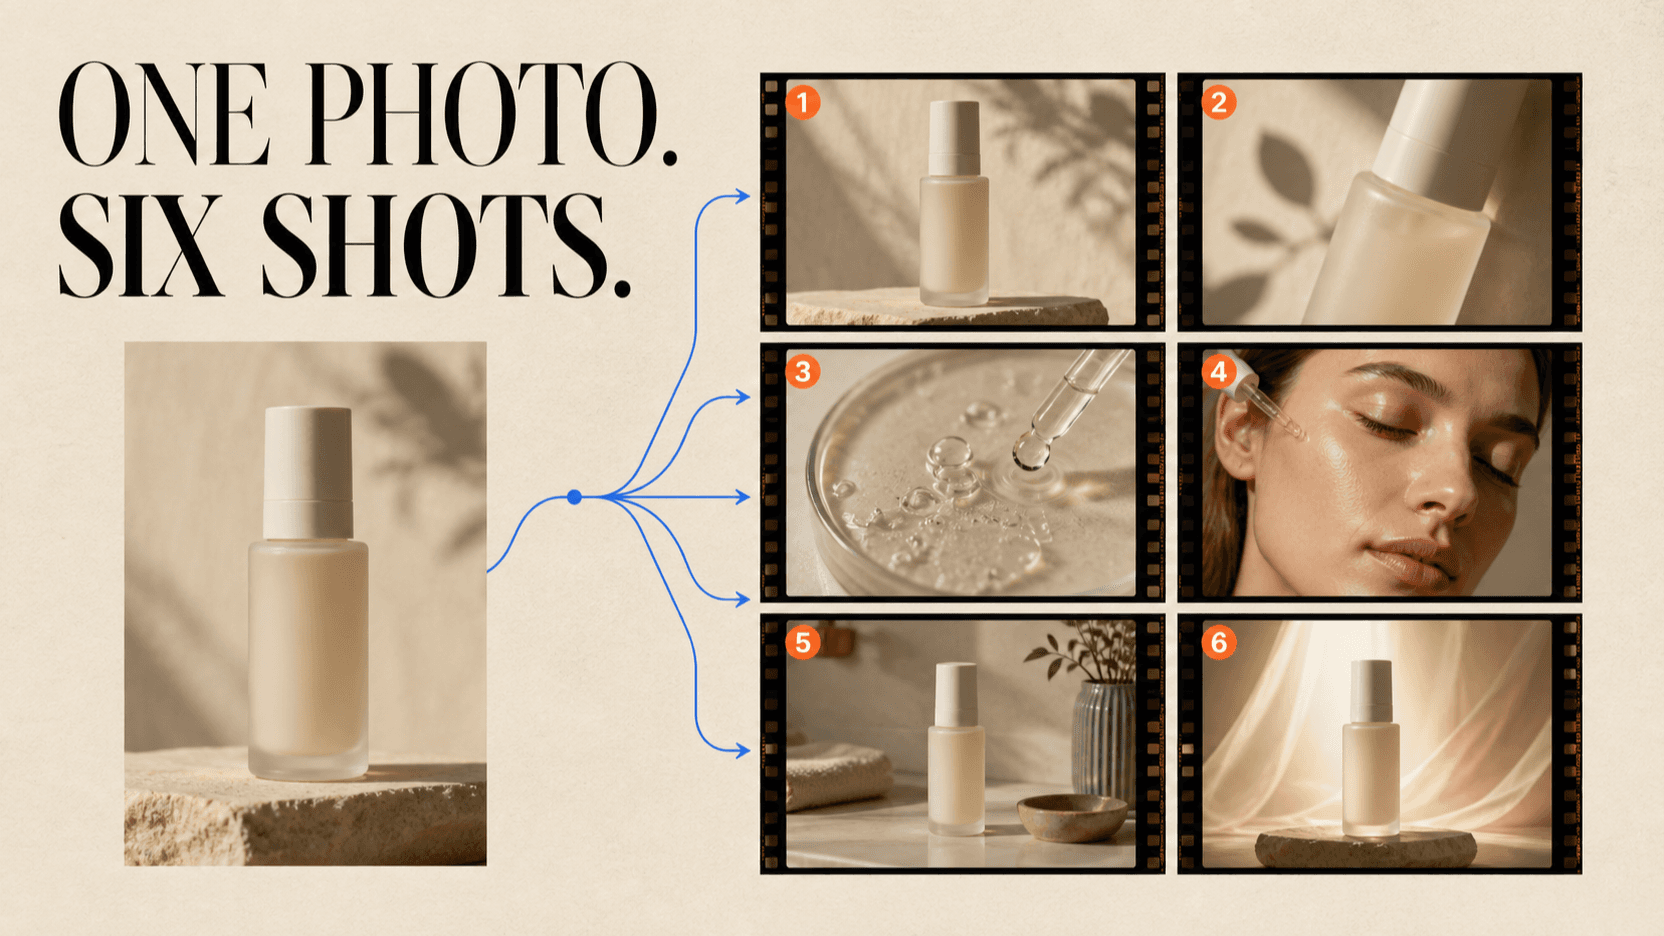
How to Turn One Product Photo into a Multi-Scene AI Video Ad
Turn one product photo into a planned multi-scene AI video ad with a creative brief, shot cards, reference rules, prompts, API examples, and QA checks.
Turning one product photo into a multi-scene AI video ad is mainly a planning problem. The model can generate attractive movement, but it cannot decide your audience, claim, shot order, product rules, and delivery format unless you make those decisions first.
This beginner workflow uses one clean product photo as the identity anchor, builds a six-scene plan, generates short shots, and reviews each one before the edit. It does not assume that generated label text will be reliable. Critical copy, prices, disclaimers, and calls to action belong in post-production.
TL;DR
- Start with one message for one audience and one delivery format.
- Clean the product photo and write down the details that cannot change.
- Plan six shots by purpose, not by visual novelty.
- Generate short shots independently when precise editing matters.
- Keep the product anchor and negative constraints identical across the batch.
- Approve silhouette, label layout, count, contact, and end frame before style.
- Add exact text, pricing, and legal copy in an editor after generation.
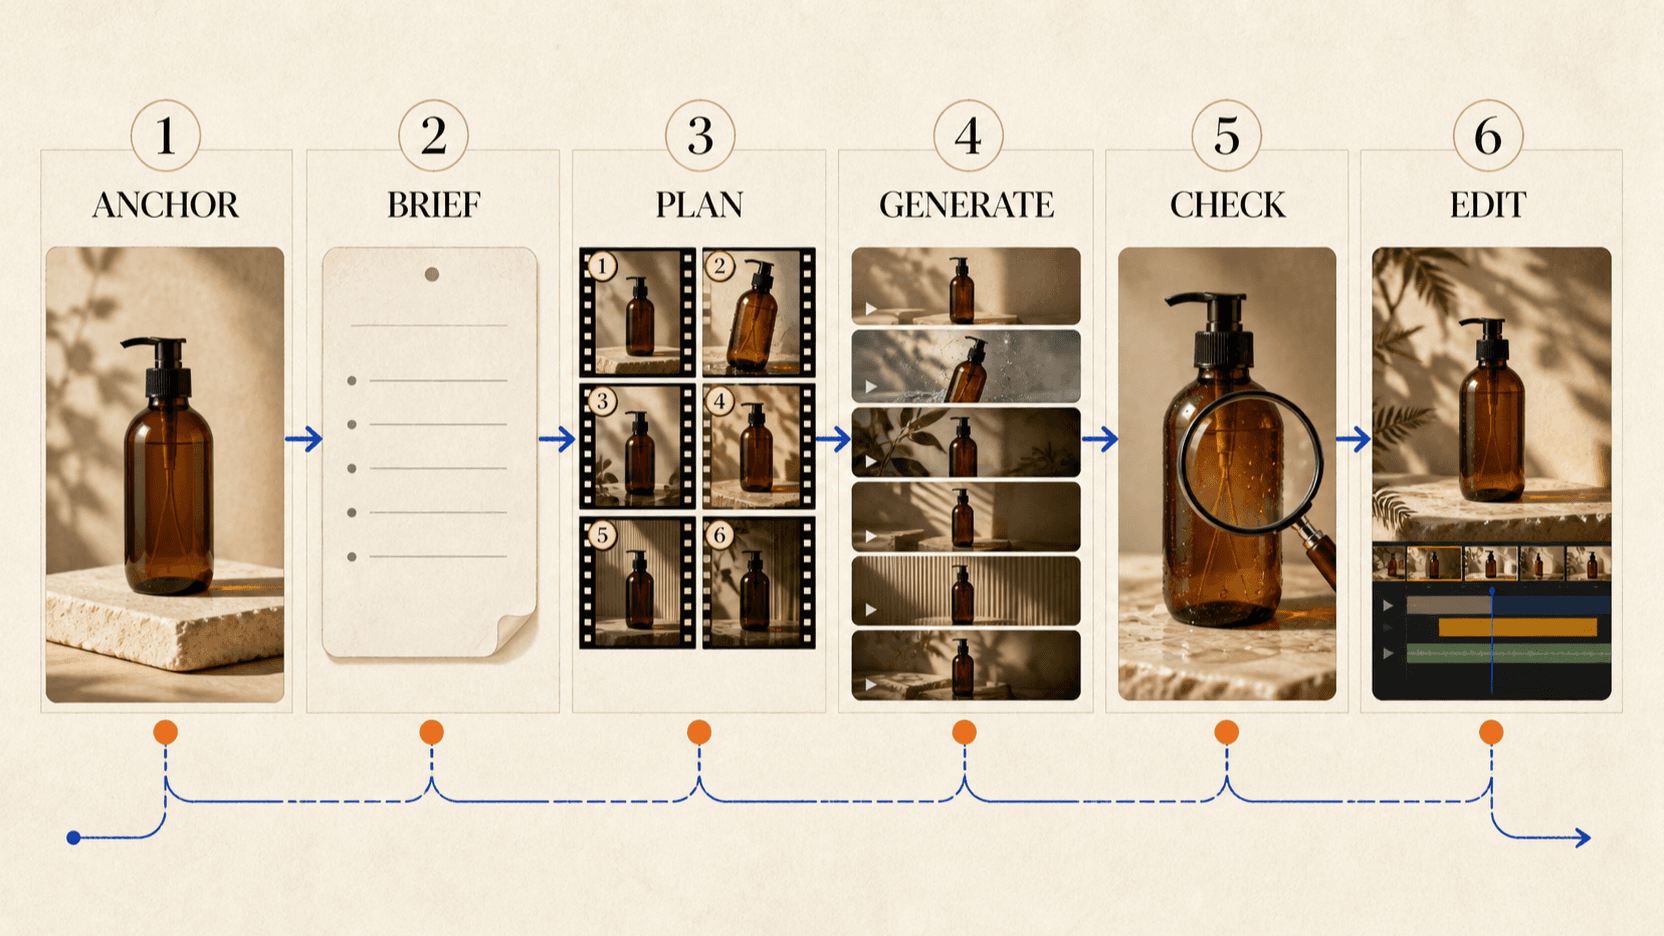
What one product photo can and cannot provide
A good packshot can anchor color, silhouette, cap shape, broad label layout, and surface material. It cannot show every side of the product, hidden geometry, how the lid opens, or what should happen in six different scenes.
Treat the source image as evidence, not a complete 3D model. If the ad requires an exact back label, mechanism, or view that the photo does not show, capture another reference or avoid that angle.
The safest source photo has:
- one product, fully visible;
- a plain or removable background;
- even light without blown highlights;
- enough resolution to inspect edges and label placement;
- no hand covering important geometry;
- clear rights for commercial use.
If package typography must be exact, plan to composite the label or product plate in post. ByteDance's own Seedance 2.0 evaluation notes continuing room for improvement in text rendering accuracy.[1]
Step 1: Write a one-page creative brief
Do not ask for scenes until the ad has one job.
{
  "product": "unscented facial moisturizer",
  "audience": "people with dry skin who dislike heavy creams",
  "single_message": "light texture, comfortable daily use",
  "proof_to_show": "thin texture spreads quickly and leaves no visible residue",
  "format": "9:16 social video",
  "length": "18 seconds",
  "tone": "clean, calm, practical",
  "cta_added_in_post": "See ingredients",
  "claims_to_avoid": [
    "medical treatment",
    "guaranteed results",
    "unverified before-and-after claims"
  ]
}
The single_message field prevents the storyboard from becoming a catalog. An
18-second ad cannot explain every benefit. Pick one point the visuals can
actually support.
Step 2: Create a product identity contract
Write the product rules once and reuse them in every shot.
{
  "must_keep": [
    "one white cylindrical bottle",
    "short matte-white pump",
    "label remains centered and rectangular",
    "thin cobalt band near the base",
    "bottle height-to-width ratio",
    "no additional words, logos, badges, or products"
  ],
  "may_change": [
    "background",
    "camera angle within visible reference evidence",
    "lighting softness",
    "supporting props"
  ],
  "never_generate": [
    "exact marketing copy",
    "price",
    "rating",
    "medical claim",
    "disclaimer text"
  ]
}
This contract is more useful than repeating “keep the product consistent.” It lists observable conditions that a person or agent can review.
For complex camera moves, a white-model or additional angle can improve spatial guidance. The existing Seedance e-commerce workflow explains that reference hierarchy. This tutorial stays focused on planning the ad from a minimal starting asset.
Step 3: Plan six scenes by function
Every shot should earn its place in the edit.
| Shot | Duration | Job | Visual plan | End frame |
|---|---|---|---|---|
| 1. Pattern break | 2s | Stop the scroll | Bottle silhouette enters through soft foreground shadow | Product centered |
| 2. Identity | 3s | Show what it is | Slow 20-degree orbit, label side visible | Front three-quarter view |
| 3. Texture | 3s | Show the proof | Small amount dispensed onto clean glass | Drop fully separated |
| 4. Use | 4s | Demonstrate application | Hand spreads thin layer on forearm | No visible residue |
| 5. Context | 3s | Place in routine | Bottle beside towel and water on bathroom shelf | Product unobstructed |
| 6. Hero | 3s | Create CTA plate | Locked close shot with negative space above | One-second hold |
This sequence moves from attention to identity, evidence, use, context, and an edit-ready finish. A different product may need different functions, but the shots should still have jobs.
Step 4: Turn every scene into a shot card
The shot card separates fixed product rules from the change requested in that shot.
{
  "shot_id": "03-texture",
  "purpose": "show lightweight texture",
  "duration": 3,
  "start_state": "bottle upper third visible, pump untouched",
  "action": "one slow pump dispenses a small translucent drop onto clear glass",
  "camera": "locked macro side view",
  "light": "large soft source from upper left",
  "end_state": "drop fully separated, bottle shape unchanged",
  "must_keep": [
    "one bottle only",
    "same pump and cobalt band",
    "no added text"
  ],
  "reject_if": [
    "pump changes shape",
    "two drops appear",
    "liquid originates outside nozzle",
    "label becomes invented text"
  ]
}
The reject_if field turns subjective review into a usable checklist. It also
supports a selective AI video critic loop
later.
Step 5: Decide between one long generation and separate shots
One long generation is convenient when the model can create a coherent multi-scene sequence and exact edit timing is not critical. Separate shots give you more control over duration, repair, and order.
For a first campaign, generate separate clips because:
- one failed texture shot does not destroy the hero shot;
- each prompt stays focused;
- the editor can change pacing without regenerating;
- different shots may need different references;
- the final CTA hold can be extended independently.
Once the shot cards work, you can test whether a model handles the six-scene sequence in one pass.
Step 6: Write a reusable prompt header
Put the identity contract at the top of every request.
Image 1 is the product identity anchor. Preserve one white cylindrical bottle,
the short matte-white pump, the centered rectangular label layout, the thin
cobalt band near the base, and the bottle's height-to-width ratio.

Do not add words, logos, badges, ratings, prices, extra bottles, or packaging.
Do not redesign the pump or label. Keep the product fully opaque and physically
grounded.
Then append only the active shot card:
SHOT 03 — TEXTURE
Locked macro side view. One slow pump dispenses a small translucent drop onto
clear glass. The liquid must originate at the nozzle and separate into exactly
one drop. Large soft light from upper left. End with the drop fully separated
and the bottle unchanged. No camera movement, hands, captions, or music.
This makes prompts consistent without making them identical.
Step 7: Generate a 720p layout pass
Use lower-resolution tests until composition and product integrity pass. Then rerun approved shot cards at the required delivery resolution.
curl https://reapi.ai/api/v1/videos/generations \
  -H "Authorization: Bearer YOUR_API_KEY" \
  -H "Content-Type: application/json" \
  -d '{
    "model": "doubao-seedance-2.5-face",
    "prompt": "Image 1 is the product identity anchor. Preserve one white cylindrical bottle, short matte-white pump, centered label layout, cobalt band, and proportions. Do not add text, logos, badges, prices, or extra products. Locked macro side view. One slow pump dispenses exactly one small translucent drop onto clear glass. End with the drop fully separated and bottle unchanged.",
    "image_urls": ["https://example.com/product-packshot.png"],
    "resolution": "720p",
    "size": "9:16",
    "duration": 4,
    "generate_audio": false
  }'
Seedance 2.5 accepts text, image, video, and audio references through reAPI, but the allowed combinations depend on the task mode. Use the live API documentation as the implementation source of truth.
Step 8: Review product truth before aesthetics
Check the product in this order:
- Count: exactly one product when the shot calls for one.
- Silhouette: height, width, cap, pump, and edges remain stable.
- Label layout: major blocks stay in the correct place.
- Contact: hands, liquid, surface, and product interact plausibly.
- Action: the planned event happens once and in the right order.
- End frame: the shot lands on the composition needed by the edit.
- Style: lighting, set, color, and finish support the brief.
An attractive shot with a distorted product is a failure. A plain shot with a correct product can often be improved through lighting, background, or editing.
Step 9: Assemble the edit and add exact copy
Bring approved clips into an editor. Cut for the final platform rather than forcing every generated duration into the timeline.
Add these elements in post:
- verified product name and label plate when required;
- headlines and calls to action;
- price and offer dates;
- legal or safety disclaimers;
- brand fonts and exact colors;
- licensed music, voice-over, captions, and sound mix.
This separation protects accuracy. Generative video creates the motion plate; the editor creates the final communication artifact.
Step 10: Record the winning recipe
Save the source image, creative brief, identity contract, shot cards, prompts, model ID, request settings, accepted outputs, and repair notes. The next product should reuse the structure, not the previous product's visual details.
/campaign
  /source
  /shot-cards
  /prompts
  /generated
  /approved
  /edit
  production-notes.md
A repeatable file structure is the beginning of an agent workflow. The agent can read shot cards, submit tasks, poll results, run checks, and request human review without inventing the campaign strategy.
Common beginner mistakes
Asking one prompt to invent the campaign
The model will choose scenes based on visual probability, not your funnel or claim. Write the brief and shot jobs first.
Showing angles the source photo does not support
Hidden geometry becomes an invention. Capture another product angle or keep the camera within what the reference proves.
Generating exact promotional text
Do not trust generated text for prices, claims, or disclaimers. Add it in post from an approved source.
Changing the product rules between shots
Keep the same identity header and source photo. Only the active shot card should change.
Regenerating the whole ad after one failure
Repair the failed shot. Separate clips exist so accepted work can remain frozen.
FAQ
Can one product photo really support six scenes?
Yes when the scenes stay within the visible geometry and use the photo as a consistent anchor. Capture more angles when the ad needs hidden sides or exact mechanical behavior.
Should I generate all six scenes in one clip?
Beginners should start with separate clips. A single generation is useful for coherent flow, but it is harder to repair and edit precisely.
How do I keep the product consistent?
Reuse the same clean anchor, repeat an observable identity contract, avoid unsupported angles, and reject silhouette or label drift before evaluating style.
What resolution should I test at?
Use a lower-cost layout pass such as 720p when available, then move approved shot cards to the final resolution. Check the live rate card because billing is model- and configuration-specific.
Can an agent automate this workflow?
Yes. The creative brief, shot cards, reject rules, and file structure give an agent bounded decisions. Keep human approval for claims, product truth, brand copy, and the final edit.
Conclusion
One product photo can become a useful multi-scene AI video ad when the workflow supplies the missing production decisions. Lock the message and product truth, give every shot a job, generate and review clips independently, and add exact communication in post. The reusable asset is not a magic prompt; it is the brief, identity contract, and shot plan working together.
References
- ByteDance Seed. Seedance 2.0 Official Launch. February 12, 2026. seed.bytedance.com
- ByteDance Seed. One-take Creation, Flexible Referencing: Introducing Seedance 2.5. July 31, 2026. seed.bytedance.com
- reAPI. Seedance 2.5 API — Parameters, Modes & Billing. Retrieved August 27, 2026. reapi.ai
Author

Categories
More Posts

MiniMax H3 License: Territory, Revenue, and Commercial Use
MiniMax H3 is open-weight but not Apache or MIT. Read the territory exclusions, $20M revenue threshold, attribution rule, and self-hosting checklist.
Gemini Omni API: Preview Specs, Pricing, and Limits
Google's Gemini Omni API preview explained: model ID, Interactions API, 720p output, pricing, input limits, multi-turn editing, and reAPI differences.
Can You Tell If a Writer Used ChatGPT? Patterns, Not Proof
Can you tell if a writer used ChatGPT? Learn the recurring style signals, why no phrase proves AI authorship, and a fairer way to review suspicious text.